How to Fix Google Home’s Shopping List (again)

ifttt logoA few months ago I wrote about how to fix Google Home’s shopping list when I ran into an unusual error.

Two weeks after that post, Google removed the shopping list’s integration with Google Keep entirely. It now saves your shopping list to a weird isolated Google Express webapp, which notably has no offline access.

Without offline access, I can’t use the shopping list in a number of stores with poor cell signal.

Boo Google, this was an awful decision clearly done just to push shoppers toward Google Express. I could rant for a while about how much this decision bugs me. (This also eliminated the only reason I used Keep.)

But there’s a fix! Thanks to the magic of IFTTT, you can hijack Google Home’s voice commands and do something else with them instead. I wrote some applets there that save my shopping list items to the Todoist app instead of the Google Express webapp.

In the interest of sharing, here they are:

Create an IFTTT account, link it to your Google and Todoist accounts, and you’re off.

Note that you’ll need to set up both applets to get it to work with more variations on the voice command – IFTTT doesn’t let you specify enough variations in one applet alone.

How to Fix Google Home’s Shopping List

June 2017 update: This doesn’t work anymore, Google made major changes to how shopping lists work on Google Home. See this updated post.

I love my Google Home! I switched from the Echo a while back, largely for two things:

  • Chromecast integration
  • A much better shopping list app

(I could go on a looooong rant about how much I hate the Echo’s companion Android app.)

But lately the Home’s shopping list functionality started failing me. It worked fine until about a month ago, when it got very confused:

I kicked it off with the usual “Hey Google, add cheese to my shopping list”. After a 5-10 second pause, Home almost always told me it didn’t understand what I was asking. If I tried again, sometimes it worked and sometimes it didn’t.

To make matters worse, sometimes the Home was actually adding items to my shopping list when it told me it wasn’t.

Here’s how I fixed it:

  1. In Google Keep, delete the note that Home uses for your shopping list.
  2. Use a voice command to add something to your shopping list.
  3. Home will re-create the shopping list note
  4. Now it works just fine! No more lengthy delay or failed commands.

Important note: This will obviously delete all the items on your original shopping list.

I still don’t have any hard evidence for what causes this, but here’s my theory:

I had more than 350 items that I’d added to that list and then checked off as I bought things. All of those items were technically still part of the list, just hidden from view. Maybe that got too large for Home to handle?

Who knows. But I’m going to delete the list every couple months from now on.

As I’ve written before, I like to document tech fixes – especially when my usual searches for help failed me. With a little luck this’ll fill in some Google gaps.

Assess Your Website with Free Usability Testing Tools

Back in April I did a webinar for NCLA’s Technology and Trends roundtable: “Assess Your Website with Free Usability Testing Tools”

I didn’t get around to posting it at the time, but the recording is freely available! I covered how to use tools like Optimal Workshop, Optimizely, and Marvel to do quick and free usability testing of your site. It’s a beginner-friendly presentation, starting with an intro to just what usability testing is and why it’s useful.

The slides are available below, but they probably make more sense if you just watch the recording instead.

How to fix Amazon’s “Send to Kindle” feature

stkTopBanner[1]When I manage to fix a technical issue that doesn’t seem to be well documented online, I like to share what worked for me. In that spirit:

This morning, as I often do, I emailed an ebook file to my @free.kindle.com address to load it onto my Kindle. For the first time in years, it didn’t work. I got no error message from Amazon, and never got the standard email acknowledging receipt of my file either. The file just never appeared on my Kindle. I tried sending it via their Send to Kindle PC application too, and got the same results – my file disappeared into the ether with no confirmation or error message.

After pulling my hair out for a while, I noticed that my Amazon Cloud Drive (everyone gets 5gb of storage for free) was full. I piled it full of some last resort backup files six months ago and promptly forgot it existed. When I deleted a few files out of that Drive today, suddenly all my Send to Kindle features started working again. I don’t know if this is a policy change or related to the recent changes to the structure of Amazon Cloud Drive, but I do know my Drive has been full for months. I don’t know why it suddenly started rejecting my files, but there we are.

Side note: It’s very poor design for Amazon to not provide any error message in this situation. They could very easily email me about the full Drive, or pop up a message in the PC application. Both options looked like they sent the file successfully. Amazon support was also completely clueless about this when I contacted them.

The TL/DR version: If your @free.kindle.com email address or Send to Kindle program has suddenly stopped working and provides no error messages, check if your Amazon Cloud Drive is full.

Exporting page details from WordPress for a content review

Now that we’ve got a large chunk of the UNC Library site‘s content in WordPress, we’re working on setting up a system to do semi-annual content reviews. Before we can plan the review itself, we needed to be able to pull details about our pages from the CMS. WordPress doesn’t have a simple way to export page metadata that would be useful for this task, like the last modified date and the name of who last modified it. As with anything in WordPress, there are of course plugins that would do this for us. But I’m trying to keep our plugin count as low as possible. And a plugin seems like overkill for this kind of thing anyway.

I used the opportunity to expand my WordPress coding chops a tiny bit, and dug into their codebase. A very helpful StackOverflow thread set me on the right path, and wpquerygenerator.com made writing the actual query dead simple.

Here’s my code, also embedded below. Put it in a .php file in your root WordPress directory, then open it in your browser. You’ll get a tab-delimited file suitable for importing into Excel. It includes the title, url, last modified date, and last modified author for your site’s last 50 edited pages. If you want other fields, the code is pretty easy to play with.

From there we’ve got a nice list to start reviewing!

Webinar: Learn how to learn to program

I’m doing a webinar next Wednesday for NCLA all about how you can learn to do a bit of programming.  Here’s the official info – note that it’s free and you don’t have to be an NCLA member to drop in:


Please join the NCLA Technology and Trends Round Table for the next webinar in our series, coming up soon!

Wednesday, March 20, 3-4pm
Teach Yourself How to Program
Leader: Chad Haefele, UNC-Chapel Hill

Programming skills are in demand, but it often seems like an intimidating topic to learn. When we surveyed roundtable members, the number one thing we heard was that you wanted to learn to program. While we can’t quite do that in one short session, we can do the next best thing: teach you how to teach yourself. Many programmers have little or no formal training, and picked it up as they went along instead. You can do that too! We’ll talk about what it’s like to learn to program, provide some guidance on what language to learn, and look at a number of free web-based teaching tools and resources. No prior experience is necessary.

Please RSVP by Wednesday, March 20 at 8am using this link: http://tinyurl.com/tntwebinar2

All webinars will be conducted using Blackboard Collaborate. A link will be sent out to all participants on the morning of March 20.

If you have any questions, email Kathy Shields at kshields[at]highpoint.edu or Jenny Dale at jedale2[at]uncg.edu.

How to add a Meebo, Libraryh3lp, or other chat widget to a Facebook Page (updated)

Over four years ago I wrote what I never imagined would become one of the more popular things I ever produced:

How to add a Meebo widget to a Facebook Page

Unfortunately, I noticed recently that due to some changes in how Facebook Pages are set up the instructions there don’t work anymore. In some ways it’s actually been made easier, thankfully.

Here’s an updated version of how to add a Meebo, Libraryh3lp, or other chat widget to a Facebook Page:

  1. Add the Static HTML app to your library’s page: https://apps.facebook.com/static_html_plus
  2. Visit your library’s page. In the boxes below your images (photos, likes, map, etc) you should see a new one that says ‘Welcome’ with a star icon. Click that star.
  3. You’ll see a box that says ‘enter your content here’.
  4. Paste the HTML code for your embeddable chat widget in that box. I’ve tested this with both Libraryh3lp and MeeboMe widgets, but I think it should work with other systems too.
  5. Click Save Changes.
  6. Go back to your library’s Facebook page, and hover your mouse over the star icon again. Click the pen icon that appears in the upper right of that graphic.
  7. Click Edit Settings to change the title (which reads ‘Welcome’ by default) and image of that star box. The box is what users will click on to chat with you.

One important note – if you yourself click on the star icon while logged in as an admin for your Facebook Page, you’ll always go to the settings screen where you pasted code into the box. Admins can’t see the functioning embedded widget for some reason.

If anybody who isn’t a page admin clicks that star, they go to the functional chat page that we want them to see. To test if it’s working right, log out of Facebook. Go to your library’s page while still logged out and click the star icon. If all’s well you should see the functioning chat box.

As usual, I’ll do my best to answer questions here but I can’t promise I’ll solve your issue.

Geotagging my photos for greater datanerdery

When I do my year in photos project (every odd year since 2005) my worst librarian tendencies surface and I get somewhat obsessive about organizing them and making sure all the metadata is just so.

This year I’ve got a new wrinkle in that mix: geotagging. GPS data can be embedded in a photo, enabling all kinds of cool mapping stuff. Mostly I just like looking at where I’ve been this year in Picasa:
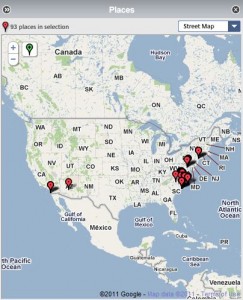
When I take the daily photo on my phone, all’s well with the geotags. The phone uses it’s GPS function and embeds the coordinates in the photo. But my phone’s camera isn’t amazing, and I try to use my Canon camera instead when possible. The Canon has no embedded GPS, so has no way to know where each shot is taken. Sure, I could manually place them on a map in Picasa or Flickr, but that’s tedious and inexact and requires a more detail-oriented memory than I usually possess.

I could also upgrade to a new point & shoot camera with GPS built in, but I’m not willing to face that expense right now. I wanted something that would tie my phone’s GPS into the camera. I didn’t expect to find much, but somewhat surprisingly there’s actually multiple options to do this:

First I found the aptly named Geotag Photos software. There’s two pieces: a phone app (for both Android and iPhone) and a desktop application. Turn on the phone app while you’re out taking pictures. It logs your position at regular (configurable) intervals. When you’re back at your computer, the desktop application compares photos’ timestamps with the gps log from the app. When there’s a reasonable match, it adds the tag to your photo. In my experience this works very well, but requires that I remember to turn the app on and get it logging before I snap a shot. That’s not a big deal for a day of frequent shooting, but for spur of the moment stuff it becomes an issue. I should note that the mobile app can be significant battery hog too.

Second is LatiPics. I’m a little astonished that Latipics has such anemic coverage on the web, because it’s pretty amazing. Latipics removes the separate mobile app from the equation, using only a desktop app. Instead, it pulls locations from your Google Latitude history. I already have Latitude turned on and logging, so it requires no extra effort on my part. Otherwise, the desktop application works a lot like Geotag Photos – it compares photo timestamps to my Latitude log, and adds geotags to the photos where there’s a match. This is pretty much my ideal solution (see the aforementioned lack of extra effort), but Latitude updates my location at somewhat random intervals and as a result doesn’t always provide a precise location for a photo. And of course, LatiPics requires you have Latitude history logging turned on and use a phone that can regularly update the service.

A third option is using an EyeFi SD card. I haven’t tried this personally, but don’t think it would suit my needs. EyeFi geotagging relies on examining your proximity to wifi access points, and so is less precise than a real GPS unit. And if you’re not in range of any wifi networks, it can’t do any tagging at all.

Geotag Photos and Latipics have different strengths and weaknesses. I find that I use both as a result: Geotag Photos for higher precision when I’ve planned taking pictures well in advance, and Latipics as a slightly less precise ‘better than nothing’ backup plan for spur of the moment opportunities. I should also note that Latipics is free, while Geotag Photos’ mobile app costs about 3 Euros.

(As a perhaps obvious final note: there’s clear privacy issues with sharing geotagged photos online. Mythbuster Adam Savage once accidentally revealed where he lived via a geotagged photo. Just be careful and use common sense.)

Search for the answer, not the question

I don’t listen to a lot of podcasts, but I try to make time every week to fit in This Week in Google. Leo Laporte, Jeff Jarvis and Gina Trapani always have interesting takes on wide-ranging web issues (the show’s scope often wanders quite a bit broader than the title implies).

Last week they had on Andy Carvin as a guest. Andy works for NPR, and has been curating a fascinating and informative collection of resources on the current Mid-East unrest via twitter. Andy talks a lot about just how he curates this list: how he’s built his network, verified sources, all the standard marks of good journalism. At one point discussion moves toward just how Andy searches for information on ‘happening now’ breaking news style events on twitter. Essentially, he puts himself in the mindset of the tweeter present at the event – what are the standard ways people react to extraordinary situations? He searches for phrases like (pardon my French) “Holy shit” or other expletives in conjunction with topical keywords. Looking for witnesses to the Japan earthquake, he had success with phrases like “What the hell was that?”.

This is exactly how I taught my INLS 501 students to search Google last semester, and likely will again this fall: Assume the answer to your question is out there, and think about how the answer might have been written. This is especially when dealing with factual questions of a slightly oddball nature. Here’s the example I used in class:

I remember a real reference question from when I was young. I wasn’t the asker, but must have been waiting in line behind whoever was: “How many windows are there in the White House?”

In the time before Google, I remember the librarian tracking down photos of the White House from each side and helping the patron count them up. (I’m not sure why this stuck with me – maybe the extraordinary level of service?)

Today I would run this Google search: “there are * windows in the White House”, or variations on that phrase. Putting the sentence in quotes returns only that exact phrase. Using the * inside the quotes means I’ll get the exact phrase with any word or number standing in for the wildcard instead. In this case, I see a few sites that tell me there’s 147 windows. I still have to evaluate the quality of those sources, of course, and maybe try variations on the phrase like “the White House has * windows” to cross check. But that’s still a lot easier than counting from photos 🙂

I just envisioned the answer as I’d write it, and let the search engine fill in the blanks. Of course there’s countless other possible searches to get to this kind of answer, but this is still my favorite method.

Back to my original rambling – Andy Carvin is a very smart man, and you should give that episode of twig a listen. There’s tons of stuff that’s likely of interest to information science-minded folks covered within.

An ode to Ninite

I recently purchased a new laptop. I got it all set up – programs installed, files transferred, etc.

My shiny new laptop’s hard drive died, almost immediately after I was done tweaking things.

I had to repeat the whole procedure.

Carbonite’s (mostly) painless file transferring aside, Ninite was the most helpful tool in this potentially frustrating process. Ninite bundles popular programs into one .exe install file. So with just a few clicks I installed Chrome, Firefox, Skype, iTunes, Hulu, VLC, Spotify, Flash, Paint.Net, Picasa, Dropbox, Steam, Google Earth, Defraggler, Revo, Winrar, even Python and Eclipse! All with virtually no intervention on my part beyond launching one install. And this is just a small subset of the programs Ninite can handle! I’m pretty sure it saved me at least an hour of running installs, not to mention trying to remember all the oddball programs I needed to get set up.

But here’s my favorite part: Ninite skips all the bloat that usually comes with these programs. No spyware, no browser toolbars, no annoyances!

I’m sounding suspiciously like a paid ad, so I’ll stop raving now. If you ever have to set up a new PC, give Ninite a try.